
Declaration of Independence: Part II
The Axle War for Independence: The Right to Bare (Control) Arms!
Build Blog
 SVT_MAN
Estimated 6 min read
Published Sep 01, 2020
. Updated Mar 21, 2026.
SVT_MAN
Estimated 6 min read
Published Sep 01, 2020
. Updated Mar 21, 2026.
Article Series
Independence Declared. Now what?
Those who paid attention in history class will probably recall that declaring independence didn't mean the American colonies were immediately freed from the tyranny of Great Britain.Similarly, merely making a grandiose declaration that I wanted to get rid of my solid axle didn't magically fling the axle off my car and replace it with a more modern independent suspension setup (commonly known as an "IRS Swap").
Instead, like the American colonies before me, I had a war to fight before I was actually free to enjoy independence. And it wouldn't be a quick one.
Now, to be sure, the American Revolution didn't happen quickly either. For those paying attention, the political and ideological revolution spanned 1765 to 1783.
Of course, I was hoping my fight would go slightly quicker (and with less casualties), but before I could fight against the solid axle tyranny, something needed to happen.
Identifying the Enemy.
When engaging in war, most would agree it's useful to know and identify your enemy. In this case, the first and most important enemy to defeat was well under way in its invasion of the entire suspension unit as delivered.
Who was this powerful enemy, you ask?
Well, you would know the enemy formally as iron oxide and informally as ... rust.

With rust squarely identified as the first enemy to conquer, I set to work.
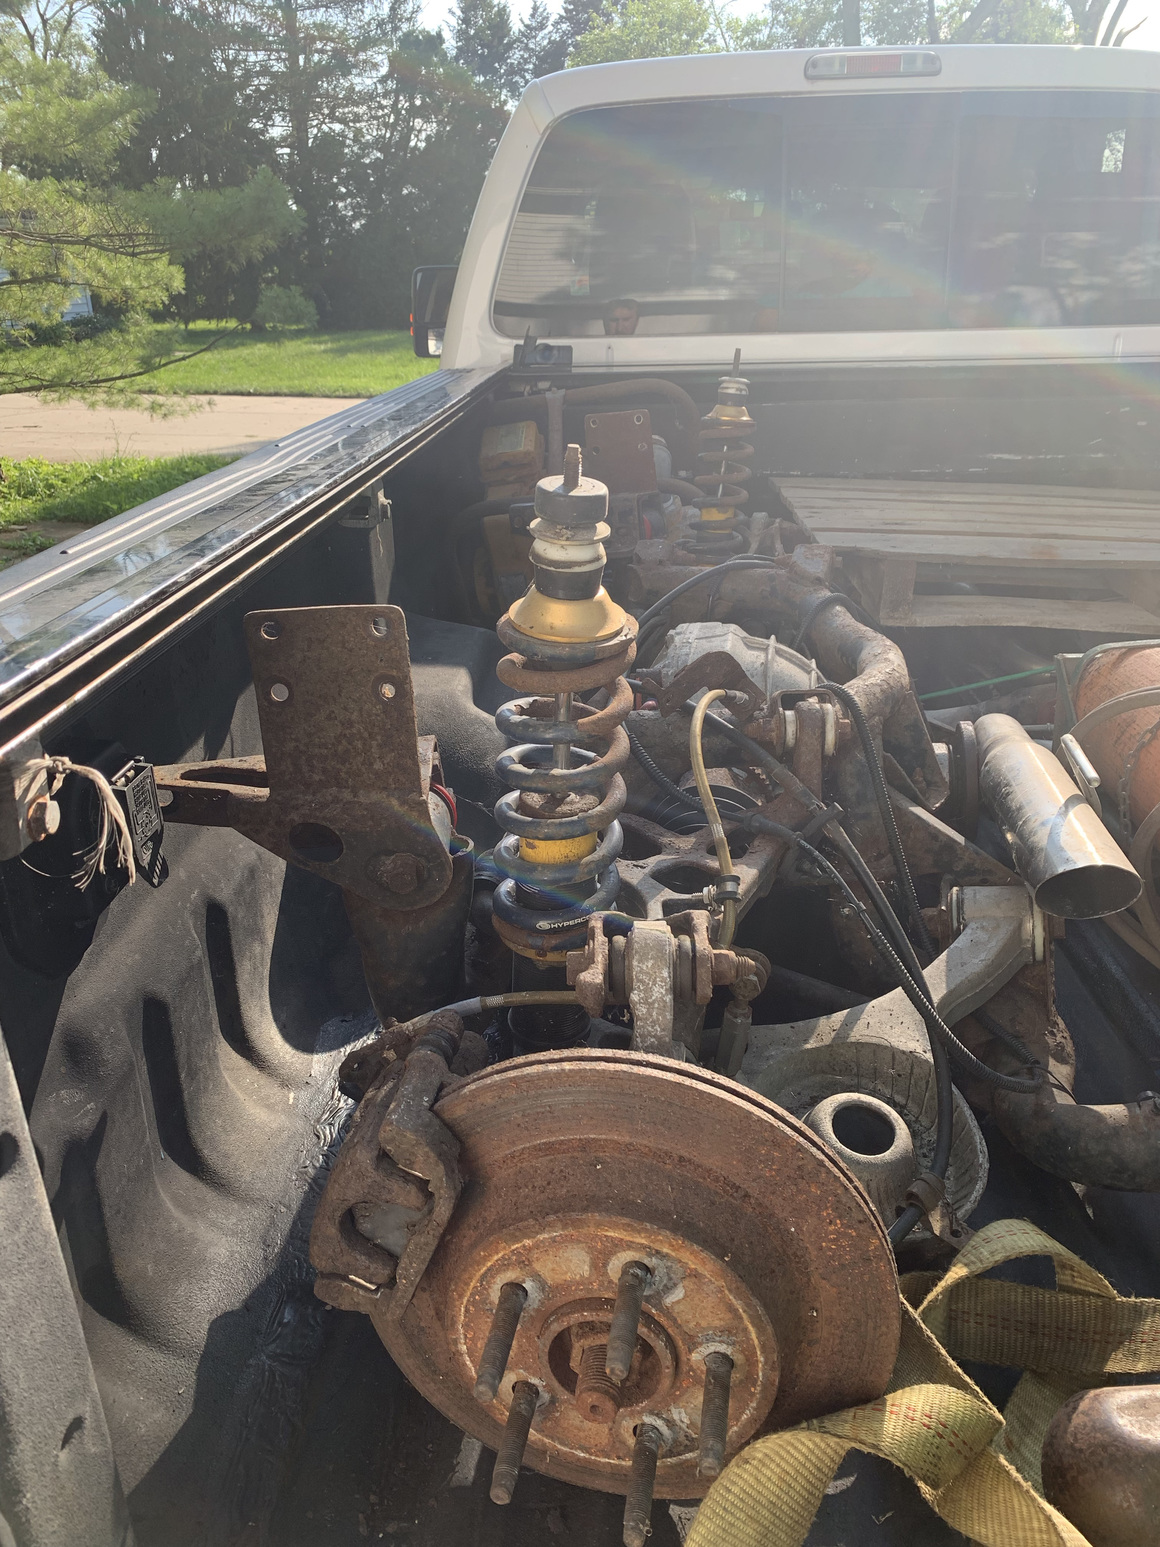
As you'll see below, the battlefield (aka the garage floor) was soon littered with the casualties of a war waged with drill guns and hand grinders:
 And, yes, that garage floor was clean prior to when I started grinding. Yikes!
Sure - but how bad was the rust, really?
It's impossible to overstate how bad the rust was on this unit. After grinding on the subframe's components for a few hours, I quickly came to an understanding of why they call it "mechanic's cologne." Yes, by the end of this initial battle, I was wearing iron oxide in my hair, on my gloves, on my shirt, and on my shoes.Frankly, these parts and pieces of this suspension were rusty even by Midwestern standards.
Don't believe me? Have a look at some selected pieces for yourself.
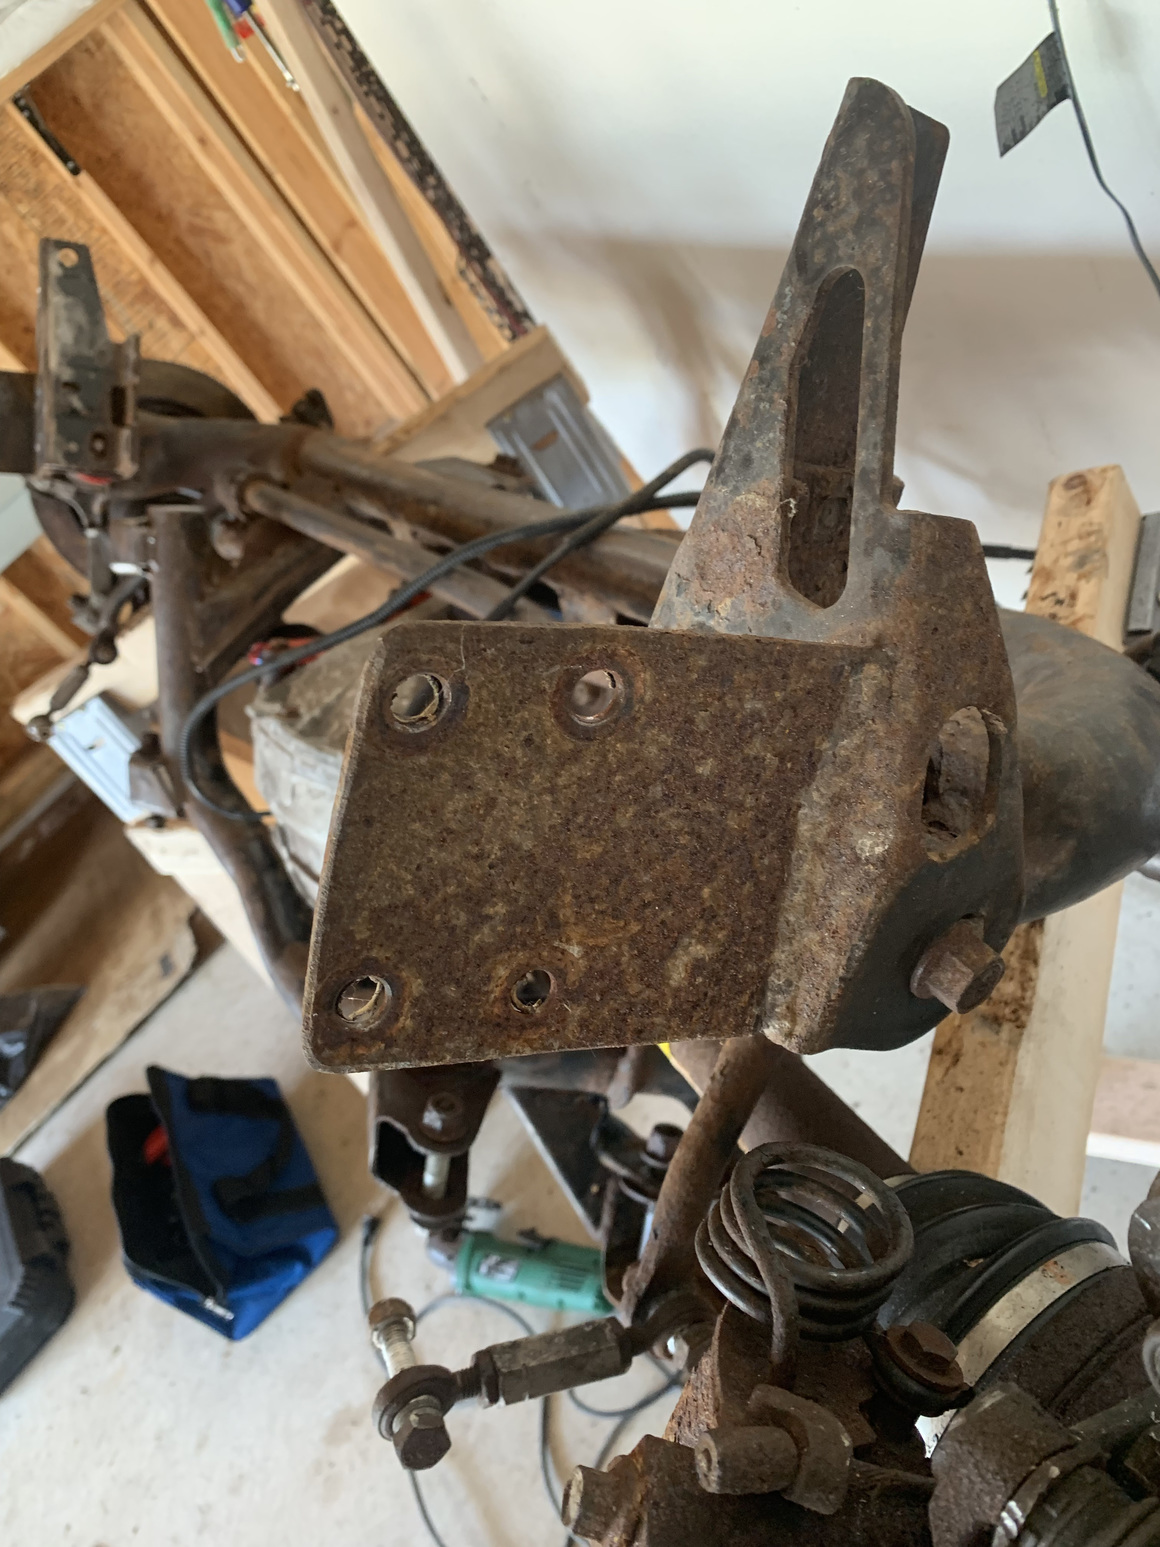
Corrosion much? Check out the springs, brackets, and rotors. Yikes!
The brackets were particularly nasty - with surface rust aplenty. Took some major grinding.
Rusty subframe jam-packed in my 20x20 garage. Somehow I fit the pony in and shut the door too!

Why tell us about the rust?
I'm telling you about the war with rust for two reasons:- For Avoidance.
This might seem obvious, but if you are looking for an IRS unit to perform an IRS swap on your solid axle Mustang, my recommendation is simple and obvious, but important: avoid the rust if possible.
I'll say it again: unless you have a weird fetish for restoring oxidized metal, I highly recommend finding an IRS unit that isn't a rusted out heap like the one that I picked up. Although I was certainly grateful to even find one, it forced me to spend months refurbishing the unit before I could even think about installing it into the car. - For Preparation.
If you decide to do an IRS swap, I wanted you to be prepared. That said, if you live in the Rust Belt like I do, short of doing a cross country road trip, you might be forced to settle for a rusted out unit.
You should keep in mind that local supply of complete IRS subframes (meaning the entire assembly - including upper and lower control arms, subframe cradle, differential, axles, toe links, sway bars, brake calipers, rotors, etc.) might be limited.
Even this particular setup wasn't incredibly close to me. I ventured about 2.5 hours away down to Illinois to pick it up and I haven't seen one available in the area since.
I've been working on the subframe ... all the livelong day!
Could the rust have been worse? Absolutely. Thankfully, it was mostly surface rust, which meant that most of it I could take care of with a grinder and some perseverance. I luckily didn't find any spots that needed new metal added.So I ground.
And I ground.
And I ground some more.
Yep - I ground, and I ground, and I ground ... until I saw that breath of fresh silver peaking through:

I kept at it on the subframe, too. And eventually more shiny came through:


Armed with Spray Cans: Ready for Battle.
After hours and hours of grinding away, I finally was ready for battle.Armed with nothing more than primer and paint, I fiercely attacked those upper control arms, subframe connection brackets, toe links, and rear sway bar:

Tech Tip
To paint items quickly and without paint runs, I found it extremely helpful to use baling wire to hang the components from the ceiling of my garage rafters. (I realize not everyone has access to a garage - but most of you likely at least know of someone with a garage.) The advantage is that it gives you 360 degrees of access to apply paint and primer to all of the nooks and crannies without having to rent time in a paint booth. If you paint it on the floor, you'll need to do a side and then flip it - and that's rather annoying and slow.
Of course, you'll want to remove any items from the surrounding area that you don't want overspray on.
I also used the same method for the subframe cradle.
As a side note: I would recommend a buddy help you hang the subframe cradle from the rafters. You can do it yourself, but balancing on a ladder with that unit isn't easy.
I painted mine during the COVID-19 pandemic while my wife was pregnant though - I didn't have much other choice than to do it myself:

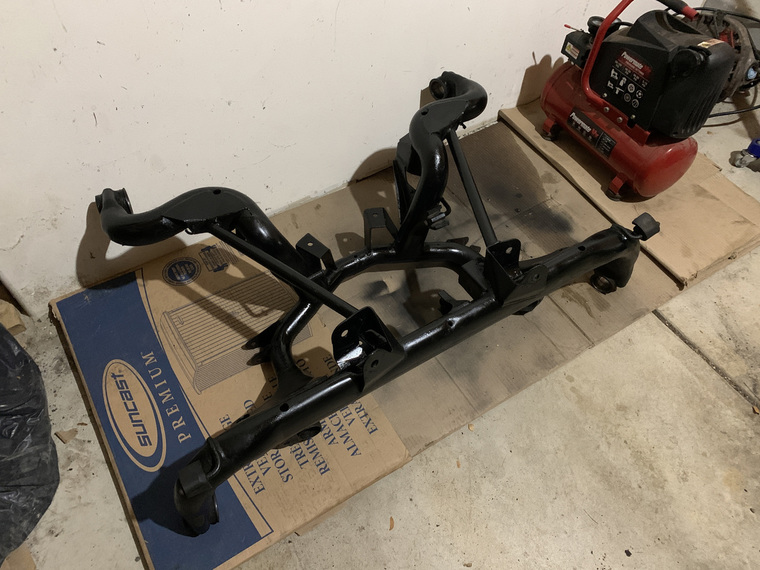
I Won the Battle ...
The fruits of my labor were evident, and I saw some great results after spending all that time grinding, priming, and painting.I wasn't going for show car quality since a) my car isn't a show car and b) look at what I started with. But I think that the effort I put into was well worth it.
Have a look for yourself.
Remember that rusty piece of junk subframe? Well, here's the Subframe unit after paint:
... But, the War isn't over.
Getting these parts cleaned up was really just the first step in getting this independent rear suspension setup ready for installation into my 1999 Ford Mustang GT.Stay tuned for Part III where I'll discuss the next battle:
Replacing all of the worn and decrepit bushings on my independent rear suspension!
Post a Comment

Featured Vehicle
1999 Ford Mustang

Engine
Liters: 4.6
Cyliders: 8
Vehicle Category
American MusclePerformance
0-60: 5.5 seconds
1/4 Mile: 14.0 seconds @ 98.0 mph
Top Speed: 142 mph
Horsepower: 260 @ 5250 rpm
Torque: 302 @ 4000 rpm
Transmission: Manual (MT)
Weight: 3200
Appearance
Exterior Color: Dark Satin Green
Interior Color: Saddle Leather
History
Mileage: 111000
Ownership: Currently Own
Overview
This is my weekend cruising car for driving on the backroads.
Modifications:
- K&N Cone Air Filter
- Smoked Headlights
- Eibach Pro Street Coilover Kit (set to lower about an inch)
- Mach 1 Grill Delete
- Raxiom LED Third Brake Light
- SVE FR500 Style Steering Wheel
- Torque Thrust IIs
- Sony MEX-XB100BT head unit
- Steeda Tri-ax Shifter
- Maximum Motorsports Full Length Subframe Connectors
- Steeda Bump Steer Kit
- Fully Independent Rear Suspension (from 2001 Cobra donor)
- Full Tilt Boogie Racing Bushings
Please Login To Your Account to comment.
User Comments
No comments yet. Be the first to comment on the "Declaration of Independence: Part II" article!